Saturday, May 12, 2012

Sugar Cookie 101 (for the non caterer)

*****************************

Our Blog has moved!  

Please visit us 


*****************************


Have you ever wondered how those bakeries make those perfectly glazed and decorated sugar cookies?  We have a great bakery in the little town next to ours that makes the best sugar cookies.  Word must have gotten out because the price has gone up from .50c each to $1.50 each over the past two years.  Fifty cents was pushing the limit for me so when I found out they had gone up to $1.50 that was all it took for me to figure out how to make them myself.  I scoured the internet searching for the different ideas and tried a lot of recipes until I finally tweaked things enough to call these the Perfect Sugar Cookies.

THE COOKIE

The Sugar Perfect Cookie Recipe
1 1/2 C. softened butter
2C. Sugar
6 eggs
2 T. baking powder
7C. flour
1/2t. salt
3t. vanilla extract
2t. almond extract

**this recipe makes 50 cookies using a 3" cookie cutter


Soften butter.  I like to get mine about half melted so it creams really easy.

Add your sugar and mix until creamed

Add your eggs, vanilla and almond extract and mix until creamy

Next, I don't know about you but I hate dishes.  I also can't seem to wrap my brain around how on earth that 2T of Baking powder and 1/2t of salt finds it's way into every cookie so I like to add my dry ingredients together in a gallon size ziploc so I can shake it all up.  Plus when I'm done there's one less dish to do. With 4 kids, I'm all about 1 less dish!! :)

measure your flour and place into your ziploc bag

Mix your salt and baking powder.
I always mix my small amounts of dry ingredients in an already dirty measuring cup.  

add it to your flower bag

Zip the bag shut and shake it up.  
You should use two hands...I couldn't take the picture and use two hands. lol

Mix your dry ingredients with your creamed mixture. I usually add about 3/4 of the bag using the mixer.

I like to add the last 1/4 and mix by hand.

Once it is all mixed together place the ball of cookie dough onto a piece of wax paper and wrap it up.  Then place the wrapped dough ball into your ziploc bag that you used to mix your dry ingredients.

Place your dough in the refrigerator.  Refrigerate for at least an hour.

Here's a random picture of the box from these melamine bowls that I bought at Costco.  THEY ARE AMAZING.  If you have a Costco membership, GET THEM!! I have either bought a set, or made people get a set of these bowls. They all have lids that seal tightly and a rubber bottom so they don't slip around on your counter when you are trying to mix.  They are light weight and the outside of the bowl is graduated making it so easy to grasp.  UH-MA-ZING.
Ok, back to baking.  


This is my favorite picture... 
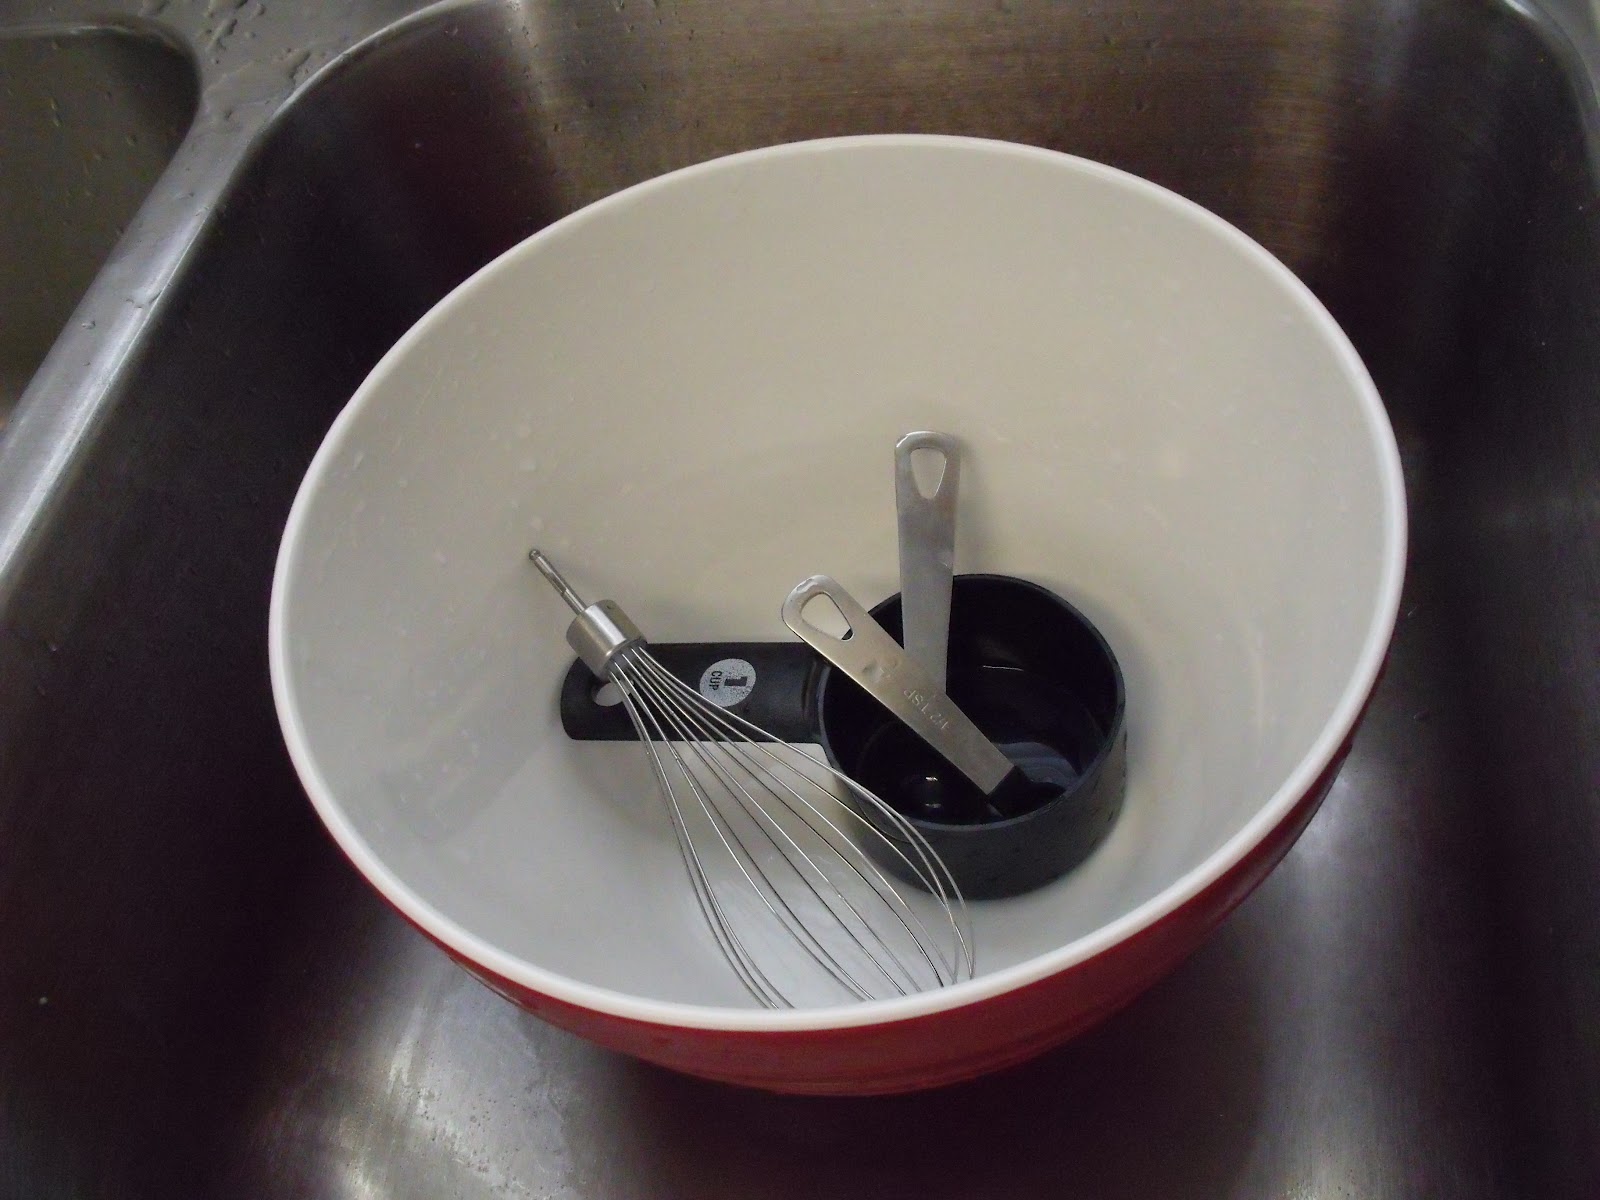
This is my sink after making these cookies.  Only 4 dirty dishes!!  
....moving on.
While your dough is in the chilling, you can make your glaze.

THE GLAZE

The easiest glaze you'll ever use recipe
1C. powdered sugar
1T. corn syrup
3 drops of lemon juice
3t. milk
additional milk to thin

**This makes enough to outline and glaze ten 3" cookies

place your powdered sugar in a bowl


add your corn syrup


add your milk

and a few drops of lemon juice

Now mix until it looks about like toothpaste.

**This is important**
Make sure you use GEL food color

Add your desired color.

 add a little at a time until your glaze is the color you want.

At this point your glaze should feel pretty thick because you are going to use it to pipe on the outline of your cookies.  You want it to be thick enough to hold it's shape until it dries.

Add some to a piping bag.  I am cheap and by cheap I mean frugal ;) I always use ziploc bags.
This is what you are going to use to outline your cookies. 

Add additional milk to your glaze.  You don't want it to be too runny but you want to be able to manipulate it easily and have it spread to the entire surface of your cookie.  I usually add about 3t. of additional milk. Cover your glaze with a tight lid so it does not dry out while you bake your cookies.

Preheat oven to 350 degrees

Remove your dough from the fridge.  Place a hand full onto a piece of wax paper.

Cover with another piece of wax paper and roll out the dough to 1/4" thickness.

Cut out your cookies

This is how thick I like mine to be :)

Place your cookies on a cookie sheet.  You can grease the sheet if you want to make it easier to remove the cookies.  I didn't.  lol

Bake for 12 minutes

(Baking times will vary with your oven.  gas may take a little longer than electric, quicker if you are using convection.  Play around with it until you get YOUR perfect cookie.)

Remove your cookies from the oven.  They will not be brown but they will be cooked.  Let them sit for a minute before removing them from the pan.  Allow your cookies to cool completely.
I always cool my cookies on a double layer of paper towels.  I'm sure some baker somewhere is cursing this blog post but, hey, it works for me.

Pipe on the outline of your cookies. Let them dry for at least an hour.

Spoon on your thinner glaze.  Use a plastic spoon or a toothpick to push it to all corners of your cookie.  If you see any bubble appear, you can use the tooth pic to pop them if you want.  I was too lazy to pop any on mine.  lol

Aren't they pretty?  Let them set for several hours until the glaze has dried.  


Pipe on your decorations.  


And there you have it.  The Perfect Sugar Cookie.  Now go get busy.
Mother's day starts in 2 minutes.  


Tuesday, May 8, 2012

Spinach and mushroom calzones


*****************************

Our Blog has moved!  

Please visit us 


*****************************


My husband is working from home today - so I thought instead of making these for dinner....I would make us a nice lunch, that we can actually sit down and enjoy.
I am not sure how things are at your house...but around here..(since having kids) rarely do we have a peaceful meal, and I can't even tell you the last time I ate something that was hot!

So, here it is.  My plan for dinner, which ended up being a delicious lunch.

First, I have to tell you.  I LOVE to cook, but I am a horrible recipe-giver-outer.
It isn't because I want to keep them a secret, it simply is because I almost always use a recipe as 'inspiration' and then end up doing my own thing.  It just goes against the grain for me to not jazz stuff up and add a little Jacki-flair to it.

SO - that being said...I don't have measurments for you with this recipe.  I did take pictures, so you can have a visual.  Hopefully that will work :)
You can use any ingredients that you like for this..feel free to use this as YOUR inspiration!


Gather your ingredients:
Fresh Spinach
Garlic
Portobello mushrooms
pizza or marinara sauce
cheese of your choice (I used shredded mozzarella)
1 can refrigerated pizza dough
(not pictured)
half an onion
parmasean cheese
Italian bread seasoning grinder

Grab a cookie sheet and grease it...or line it with parchment paper.
I prefer to use parchment paper because it saves your pan and makes for easy clean up.

pre-heat your oven to 425 degrees.

Open up your dough.
I am such a wimp when it comes to this.  I always hold it as far away as I can with one eye closed when opening these types of cans.  It always pops before i expect it to, and it scares me.  Dumb, I know.

Anyway, spread your dough out on the pan.  You are going to cut it into 4 rectangles (about 6x5).
I used a pizza cutter - I am sure a knife would work just fine.

this next step is optional.  I like to cook with a lot of flavor.
Over the years I have used several brands of Italian bread dipping seasoning to cook with.
I am pretty sure that I have never used it with olive oil and dipped bread in it...BUT it is the best to use in sauces, pizza crusts, pasta...just about anything.
I can't be sure, but I think that I purchased this at Costco.
it is wonderful :)
I grinded a little over the pizza crust to give it a little flavor.
Next - shop some onion.
I chopped up about half of an onion.
If you don't like onion - leave it out.  If you love it - use more!

heat up your skillet with a little olive oil.  If you would like to use raw ingredients - you can skip the next couple steps...I am sure it will still be yummy.
when your oil and skillet are hot - add the minced garlic.  I buy mine pre-minced for convenience...and because I use a LOT of garlic when I cook.  Ask my mom.  She is forever telling me I use too much ...  Personally, I don't think there is such a thing as too much garlic!

 Brown your garlic...keep it moving in the the skillet to prevent from burning.  Kind of like you are making scrambled eggs :)  Browning it will open up the flavors..and make your house smell wonderful. :)

I had to take a break here and smooch Mr. Serious.
He is one tasty lil man!

I diced up the portobello mushroom and added it and the onion to the skilled and sauteed
all of it together for about 3-4 minutes on med/high heat.  Just until the onions were starting to get clearish.

spoon some sauce onto the dough.  I kept it in the middle since i was folding the corners in.
Next you are going to put on your ingredients.
on top of the sauce - add your cheese.  I think I used a couple tablespoons of cheese on each.

I tore the spinach up to make it easier to pack onto the dough.
Place the spinach on top of these cheese and then spoon the mushroom/garlic/onion mixture on top.


Fold opposite corners together and pinch the dough to seal.


Repeat this step for the other corners.
I sprinkled some parm cheese on top before putting them in the oven...but you don't have to.

Bake at 425 for about 12-14 minutes.


The crust will be golden brown when ready and look something like this.


YUM!  They were just as delicious as they look!
Let me know if you give this a try..or what variations you made.

Have a great day!
Jacki


Friday, May 4, 2012

Refrigerator Door Water Tray Gunk Cleaning Trick


*****************************

Our Blog has moved!  

Please visit us 


*****************************


Okay - so this post has not a thing to do about embroidery.  Since having the baby, and being able to move around  - I am noticing all the things that fell apart in my house while I was preggo and on bed rest.  Pair delayed nesting, a horrific onset of adult ADD, with insomnia..and you have me cleaning the water tray in the fridge at 2 am and taking pictures with my phone for a blog post.  Yup... that is just how it is going to be folks.  Random posts with poorly lit, mediocre quality photos.   Hope you love it!

If you have a fridge with a water or ice dispenser...then I am sure you have this little tray.  Yours may be glistening and squeaky clean.  Mine looked like this AFTER running through the dishwasher:

 Nice, huh?  Not so much.  SO - at 2 am - I decide this is something that had to be taken care of immediately.  I took pictures of the experience to share with you.

Step 1.  Look at it about 100 times and say to yourself "I need to clean that thing...it is disgusting."

Step 2.  Finally run it through the dishwasher hoping it will get it clean, but know that it really isn't going to do a darn thing.

Step 3.  Confirm the fact that it still looks disgusting and go to your computer and google how to clean it.  That may be how you ended up here!  

Step 4.  Go to your pantry and whip out the white vinegar.  I am sure you have some.  I have 3 bottles.  Why?  Because every year around Easter time I buy a bottle for Easter eggs because I can't remember if I still have any from the year before.  I need to remind myself when I try to buy it next year that I SURE DO have white vinegar..I have enough for the entire neighborhood to dye eggs next year.


Step 5: Pour enough vinegar to fill all the groves of the tray.  I forgot to take a picture of this step - but I am sure you can figure that one out :)

Step 6.  Let it soak for a few minutes.  It really doesn't take long...I think I let mine site for 3 (maybe less, I was anxious to see if this really worked).

Step 7.  Grab a sponge or an old toothbrush.  I keep an old toothbrush in my kitchen, and another one in my laundry room.  They are fantastic to have around...you know, in the middle of the night when you need to scrub the grooves of a tray.  Put a little dish soap on it and scrub away.  I didn't have to put much elbow grease into this at all - just a light scrub.
Step 8. Run it under the faucet a little to rinse off the soap.

VIOLA!  Your water tray is clean!

Ahhh... I feel much better now :)  Easy Peasy.

Happy Scrubbing!
~Jacki~


Sunday, April 29, 2012

Sunday Night Sweets

*****************************

Our Blog has moved!  

Please visit us 


*****************************


White Chocolate Cranberry Almond cookies

Don't ask me why but, every Sunday night once I get my kids into bed, I feel like eating baked goods.  Maybe it's my sub-conscience gearing up for another week or trying to reward me for all the hard work I've done the week before. Whatever the case, I have an overwhelming feeling that I need to bake.  Tonight I debated for an hour trying to convince myself to eat a salad instead...clearly the salad lost.  I did decide to go "healthy" with my choice and made cookies that have both fruit and nuts.  lol 
They actually turned out pretty yummy, for a non-chocolate treat, so I decided to share the recipe.  If you are OCD when it comes to directions then you may hate me and my directions.  I like to cut corners.  Anything that saves me time/work and doesn't sacrifice taste, I'm all about it.  Less dishes, less mess, more time to enjoy my treats.  :)


Ingredients:

3/4C butter
1/4C sugar
1C brown sugar
1T. Vanilla
1egg + 1egg yolk
*******
2C (plus 1T.) flour
1/2 t. baking soda
1/2 t. salt
*******
1C white choc. chips
1C dried cranberries
1/2 C slivered almonds OR macadamia nuts
Pre-Heat oven to 325

1) Cream together first section of ingredients in a large bowl. 
(I usually throw my butter in the bowl first and microwave it until its half soft and half melted, then I add the sugars, vanilla and eggs)

2) In the same bowl sprinkle your 2C plus 1T. of flower over the creamed sugars completely covering it. In your dirty 1C measuring cup,  mix your soda and salt together then sprinkle it evenly over your flour.  Once you have all your dry ingredients covering your creamed sugar mix thoroughly.


3) Add your white chocolate chips, cranberries and nuts


4) Place one inch balls of dough 1-2 in. apart on your cookie sheet and bake at 325 for 15 min

5) Once your cookies are done, leave them on the cookie sheet until they have set.  (about 3 minutes)


I like to cool my cookies on a double layer of paper towels but, you can use a rack if you like. :)


My pictures may not be that great because it's midnight so the lighting is horrible but, the cookies sure do taste good.  They will be even better for breakfast!! or the 7 times I'm going to get up in the night to nurse the baby.  lol
~DeLynne

Saturday, April 21, 2012

Order in the Sewing Room!!

*****************************

Our Blog has moved!  

Please visit us 


*****************************


A Beautiful New Sewing Room
(for super cheap)


For the past 7 years I have been operating my sewing business from my ever so spacious and extremely visible, living room.  I selected a corner of the room that I would set up my sewing/embroidery machine on a fold out butterfly style table.  I kept my notions in Tupperware bins that originally had lids but, after 7 years I couldn't close the lids, let alone find them.  My fabric and ribbons I kept in my garage and my ironing board in my coat closet.  It's been oh, so cozy.  After having my fourth child recently I have been trying desperately to create some sort of order somewhere, anywhere in my life.  Jacki (who also just had a baby) and I both missed the nesting stage because we were both on strict bed rest and unable to do ANYTHING.  She went crazy on her house a few weeks ago with the label maker and She thinks this is our bodies way of postpartum "nesting"  lol.  I really just was so tired of sewing in such an nonfunctional space, I had had enough.  I am not necessarily a cheap person but, I do think I am frugal so I didn't want to spend a ton of money but I wanted it to be beautiful, of coarse.  I have had a lot of thinking time over the past few months to plan out how I would get my desired look as inexpensively as possible.

I started by making space for my new sewing room....


Then, I went SHOPPING :)

I decided how many shelving units I wanted and where I wanted to place them.  I purchased 2 five shelve bookcases ($28.97) and 3 three shelve book cases ($14.97) from Walmart.  They are super cheap there and fairly easy to assemble (if you have eyes and can follow picture directions as there are no words). hahaha
I also purchased wide mouth mason jars in 2 different sizes. (quart size and pint size) They come in packs of 12 and are between $8-12 per package.  I then purchased 3 larger Gallon size lidded jars on the Tupperware isle that were $4.50ea.
Next I bought boards to roll my fabric onto.  I actually invested a little more money in this because I wanted something REALLY sturdy that wasn't going to bend over time with the weight of the fabric.  I also wanted something that came in different sizes so I could put larger cuts of fabric on larger boards.  They sell canvas panels in many sizes for painting in 3 packs that I really, really love for this however, they are a tiny bit pricey. You can go cheaper and cut your own from the hard foam presentation board (sold on the poster board isle) or you can use comic book boards (limited size options but SUPER cheap)  I spent around $100 on boards (using a combination of canvas panels and cut foam board) for my fabric but, you could spend as little as $10 if you use comic book boards.  
For my excessive ribbon supply I bought spring tension rods from the curtain rod isle.  They were $1.98ea and I purchased 9 of them.  I also bought 10 folding bins from K-mart for $4ea ($40). They fit perfectly onto the shelves. This puts the grand total for my entirely new sewing room at $293.35.


As soon as I got home, I assembled my shelves.  It took me about 3 hours to put the 5 sets of shelves together (while I was watching The Voice and Smash, so I wasn't totally paying attention to what I was doing)  lol.  I figured it would only take me a few hours to fill the shelves up.  BOY WAS I WRONG!!  I guess I didn't realize exactly how much sewing junk I had accumulated over the past 7 years.  It took me an entire day just to sort through my notions.  


I organized my rolls of ribbon according to color then slid them onto the curtain rods.  I fit 4 rods onto two different shelves.  Just popped them right in, Easy Peasy~


Then I filled up the jars with all of my notions.


It was then time for the fabric.  I first separated it according to quantity.  Fabrics that had several yards,  more than a 1/4 yard, less than 1/4 yard and scraps.  I rolled the larger quantities onto 11x14" panels and the smaller quantities onto 8x10" panels.  I put the scraps into a bin.
 I used different sized office clips to hold my fabric onto my boards.  If there was a really large quantity on one board, I just clipped the fabric to itself at the bottom instead of over the entire end. You could just use straight pins like at the fabric store but, I have 4 little children and my oldest has spina bifida and can not feel her feet so I try extremely hard not to misplace any pins onto my carpet. I thought office clips were a lot safer for me and worked really well.
I arranged the rolled panels onto the shelves according to color for easy finding later.


For my work station I used a 6ft. folding table and set it up on top of my shorter shelves. I have another folding table that I can pull out for extra work space if needed.  It's a 5ft. table that folds in half and stores perfectly behind the front facing bookshelf (under the visible table)
I already had these but they can also be purchased at Walmart for between $20-30.


There you have it.  One brand new beautiful work space.


Now, I guess we better get some new designs going.  :) 

~DeLynne