Showing posts with label design set. Show all posts

Thursday, November 1, 2012

Pretty Little Poinsettias ~ in less than 5 minutes

*****************************
Our Blog has moved!  
Please visit us 
*****************************


We are just starting to get all of our great Christmas designs on line so naturally I am getting super excited for the holidays!  We have just these fun little ITH Favor boxes together and what better way to embellish them, than with a pretty little poinsettia?!  It's so easy.  Here's how...


Cut out some random, curvy triangular petals.  The size of each will depend on how wide you want your flower to be.  I needed a pretty little flower.  Only about 1 1/2 inches wide so I made each of my petals about 1" long and 3/4" wide.  You can always trim them down so if you are unsure how big you want your flower, make it bigger and scale it down when you are finished.


Next, thread a needle with about 2 feet of thread doubled over.  Weave your threaded needle across the straight edge or bottom of each petal.  Pull the needle through, then slide it onto the thread


Once you have all of your petals on the thread, push them together as tight as possible and tie your two thread ends together.  Knot your ends several times to make sure it won't come undone.


 This is what it should look like after you have done that.
If your flower is too big you can trim it down now.


Add a few pearls and a rhinestone using some fabric glue.  We LOVE Fabritac made by Beacons. :)
Now take that little ITH Favor Box you just made...


Super cute, right? But...


How much better is it with a pretty little poinsettia and a little bling?!


~DeLynne

Wednesday, October 17, 2012

I just want to make beautiful things - even if nobody cares


*****************************

Our Blog has moved!  

Please visit us 
*****************************


Sometimes it is easy to get caught up in the busyness of the day.
I am sure almost all of you can relate.

I love dreaming up ideas and figuring out how I can make something....but rarely have the time anymore to actually make it.  

That's why DeLynne and I work so well together.

I can dream up an idea or see something I love, figure out how to do it with an embroidery machine, digitize the files up and more times than not - shoot it over to her.  

We live in different states, so almost all of our communication is done through email.  Have you ever tried to describe how to make something that exists in your head over email?
 IT IS HARD  
Especially when there are a thousand things to do, a million "Mommy can I..."s being asked, and countless crazy interruptions. 

 She has an amazing ability to see my imagination and make it just as beautiful as it was in my head.

I love her for a million reasons....but that is definitely one of them!

Anyway, a friend of mine posted some word art on her page a few weeks ago - and I have been repeating it over and over in my head.

"I just want to make beautiful things, even if nobody cares"


So I decided I would make my own little picture and turn this into an embroidery design really fast
just to remind myself why I do what I do.


Feel free to pin this,  post it on your page, share it with your friends, or stitch it out yourself to remind you everyday why we do what we do.


Have a great day!
Jacki

Friday, October 12, 2012

Beautiful twist and roll flowers ~ So easy and to die for!


*****************************

Our Blog has moved!  

Please visit us 


*****************************


There is just something about beautiful accessories that gets me excited.  I absolutely could not live my life without them.  I have recently gained this new love for fabric flowers.  I know they are everywhere these days but, I just love them!  They can be fun, whimsical and absolutely beautiful.  There are so many millions of options and honestly, the sky is the limit.
 You really can't do it wrong but, here's a quick tutorial on these beautiful twist and roll flowers that I just made, to go on our amazing new ITH headband.  

Take a strip of fabric or ribbon.
(I used a piece of chiffon 2" wide x40" long)

Tie a knot in one end.

Hold on to the knot end with one hand and start twisting the other end.

All you do now is wrap the long tail of fabric around the knot as you twist it.  There is no right or wrong way to do it.  Every 1/2" or so you will need to add a little dot of fabric glue or hot glue to hold the fabric in place as you wrap.  You can wrap as tightly or as loosely as you want.
This pink chiffon fabric flower was wrapped pretty loosely and I love how soft and fluffy it turned out.

This is what it looks like once you have wrapped the fabric all the way around (gluing as you go)
It is perfect just like this OR...

I added a few pearls to the center using fabri-tac.

So pretty :)

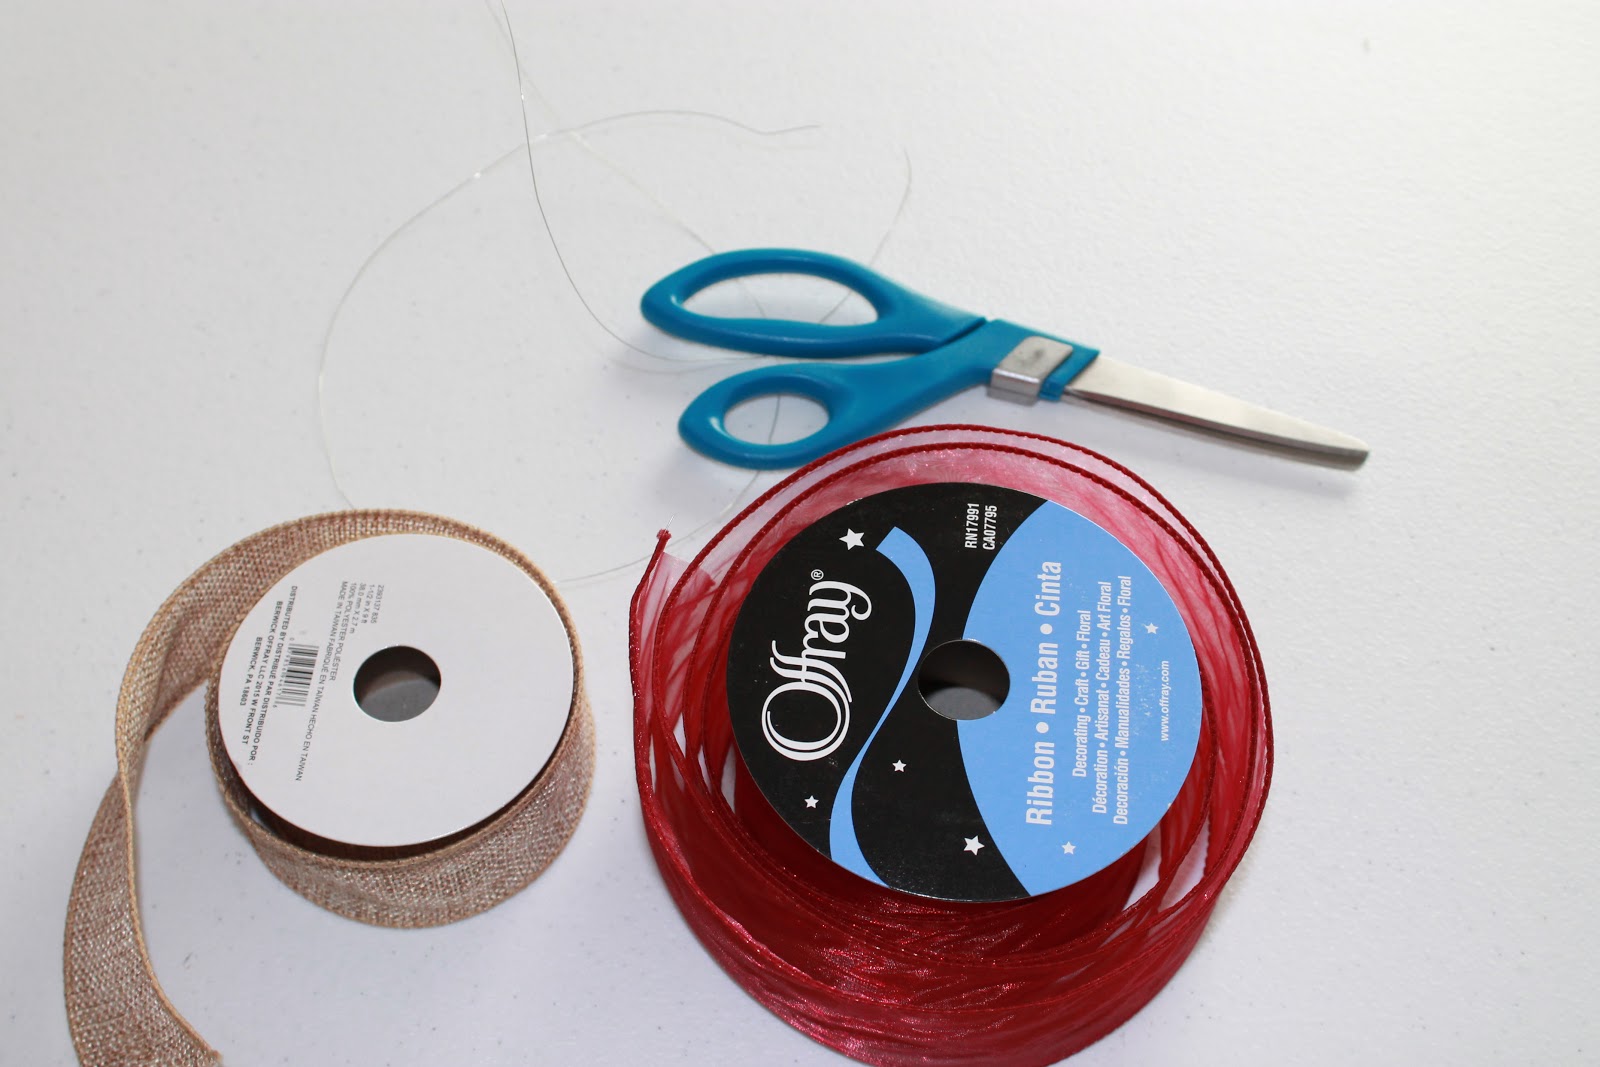
Here's another one I made using some 2" wide Organza ribbon.  This ribbon was wired so I slid the wires out because I didn't need them.

I wrapped this one very tightly to show the difference.

Once you reach the end of the ribbon or fabric, just flip the flower over and glue the end to the back so it isn't visible.

And...Voila~
Beautiful, any way you wrap it!


The best part is you can use any fabric you like.  
I love how the lace flower turned out, burlap is fun too!


They are so quick, easy and absolutely gorgeous!  Not to mention, big or small, every girl looks a little more beautiful when they are accessorized.

So go get your craft on and start accessorizing!!

~DeLynne


Thursday, October 11, 2012

How to Make Big Decorative Bows ~ a really easy tutorial

*****************************

Our Blog has moved!  

Please visit us 


*****************************


 I'm kind of a freak when it comes to bows.
I LOVE THEM!!!
This beautiful wreath made with our new
Fall Leaves Applique set
is just what I needed to go with a big beautiful bow.
A lot of people are intimidated by them but, they really are simple to make.
I'll show you, anyone can do it.

Here's what you will need:
Scissors
Wire Ribbon
A piece of wire
(I actually just slid the piece of wire I used, out of a scrap piece of wire ribbon)

You can use just one ribbon or multiple ribbons to create your bow. I used two. If you are using more then one you will want to stack them like this, with the widest ribbon on the bottom.

Make a loop the width you want your bow to be.

Wrap your ribbon around the loop at least 5 times.
(10 times if you are using only one color)
The more times you wrap, the fluffier your bow will end up.

Press your loops flat

Trim all four of the corners off.

It will look like this after you trim.

Now, line up the two sided that you trimmed, like this. 

Press the sides together where they line up

Wrap your wire around the center several times then twist it off like you would a twist tie.

Separate your loops.  Twist them a little so they stay where you want them.


Flip your bow over to the back and add a long piece of ribbon for the tails.

Use the ends of the wire from the center of your bow to secure the tails in place.  Just twist the wire tightly around the ribbon for the tails, like a twist tie again.  You can use the same wire to connect your bow to whatever you need to embellish.
What will you add yours to?

I added mine to create this fun Fall wreath I made using our Fall Leaves Applique Set.


Happy Fall, Y'all
~DeLynne


Thursday, July 26, 2012

Tips for stitching out the Princess Masks (Great for Halloween/ Dress Up/ Mardi Gras too!)


*****************************

Our Blog has moved!  

Please visit us 


*****************************


I thought I would just do a quick blog post on how I stitched these out and share some tips with you.  There really is no right or wrong way to do these...do whatever works for you.

It really isn't any harder than a regular applique!

I just love these masks.  Sure, I have a biased opinion..but seriously...what is not to love!

You can purchase the digital files here:


You will receive all three of these masks.
Each mask comes in 4x4, 5x7 & 6x10 sizes.

The 5x7 size fits children (as pictured below on our adorable model) but also fits my face.  But the 6x10 size might be a little better if you are planning on using these for adults.  I think the 4x4 would be adorable as party decor, a matching mask for a doll...or even stitched out on a garment.

So..here are the tips that I came up with along the way.

First mask - I hooped 2 layers of tear away stabilizer, ran the applique portion and trimmed my fabric.

when I finished the mask and pulled the stabilizer away it left little fuzzies all around the mask (pictured below).

There is nothing wrong with this...it probably looks fine to most people.
You could take a marker and color in the fuzzies.
I have issues...and didn't like the fuzz.  I also thought that it needed to be a little more sturdy since I know my daughter will put these on and take them off a million times in the next week alone.

So, for the next 2 masks..I did it this way.

I hooped 2 layers of heavy weight water soluble stabilizer.
First I ran the placement stitch for the design.
I then floated a piece of heavier cut away stabilizer  (You can use hard felt too) with my fabric on top of that.

I didn't take a picture of this part - but I trimmed the fabric only until I had the main pieces of the mask fabrics done..and then went through and trimmed the thicker stabilizer.  Trim as close as possible to the stitches so the final satin stitch covers the edge of your felt or stabilizer.

then I just ran the rest of the design.
I left a little more edge on the inside of the eyes to make sure that the pattered fill stitch had something to grab on to...but the parts with the satin stitch didn't need it.

As you can see from the picture above...they are stunning without any embellishments.

BUT

everything is a little more fun with sparkle and feathers!

Special thanks to "Bee" and her Mommy from Bee's Bowtique for the awesome 
"action" shots.  Here are some examples of what these masks look like
with the perfect amount of "Bee-dazzling"


You can skip the step of the holes to run the elastic through and attach them to a stick for a Mardi Gras look...
any way you choose to make them, they are so much fun!

Thanks for stopping by!!

Jacki


Monday, May 28, 2012

Lil Man Tie Banner

*****************************

Our Blog has moved!  

Please visit us 


*****************************


It is true, the little men don't ever get enough recognition.  I know in my family of 3 girls and one boy, the girls are always over shadowing my Little Man.  We are constantly trying to find something fun for boys and I think we have done a fabulous job with our newest in the hoop design.  Our Lil Man Tie Banner is here and just in time for Father's Day.  It really is so cute.  With Jacki's little Man being Christened on Father's day it is the perfect embellishment for his after party.  I was so excited when she digitized the file and couldn't wait to stitch it out and make it super cute for his big day.

This design stitches out quickly because it has a raw edge.  It is just an applique so there aren't any special instructions to have to follow.  We used Peltex as our first layer in the applique.  If you have never heard of or used Peltex, it's awesome. Peltex is an ultra firm, smooth and resilient stabilizer.  It's really easy to cut with scissors or a rotary cutter and has no grain, so you can cut it in any direction.  If you type "peltex" into your search engine it will come up with tons of places you can purchase it. I usually just get mine at Joanne's though.  :)
If you have never done a raw edge applique on your embroidery machine, no worries, click here for a quick tutorial on how to do it.
If you have never done an applique of any kind then click here for a tutorial on regular machine applique and a free download of an applique you can practice on.

We thought it would be cute to add some little buttons to the collars of our banner pieces.  I bought these little buttons at Walmart for .67 cents.


Then I used my favorite fabric glue, Fabritac, made by Beacons (also available at Walmart)  It is sometimes labeled fabri-fix but, always made by Beacons.


Just place a dot of it on each point then press your buttons on.
So Cute!


I'm all about big bows for my fancy schmancy girls but, I thought bows were a bit much for this little man so, I just folded a strip of ribbon in half and tied a loose knot in one end then slipped it through the hole punch in the design.  I pushed the other two ends through the next banner piece's hole punch and tied the second knot.  Once the knots were in place, I just tucked the two tail pieces back through the hole punch so they were not visible from the front of the banner.

It was absolutely adorable but, then I thought it would be even more adorable with a little mustache as a spacer.  So....
I loaded our Mustache Applique design into the machine and stitched it out onto a piece of Peltex.
I added a step in (and I apologize for not taking more detailed pictures).
After the placement stitch I pinned a piece of fabric to the back of my hoop.  I folded the edges in so they had a more finished look.  I placed the pins on the front of my hoop not the back so the back was still nice and flush and would stitch easily.  I then placed a piece of press and seal over the back just to make sure the fabric wouldn't get caught on anything.  Next I placed my fabric on the front of the hoop as usual and ran my stay stitches.  I then trimmed my fabric on the front and back before running the satin stitch outline. 


This is what the back looked like when I finished.  So simple to run the ribbon through for the banner.


And the front, just as cute as ever.


We can't help but love it.  We hope you and your man (big or little) do too!

~DeLynne