*****************************
Our Blog has moved!
Please visit us
*****************************
A quick little step by step tutorial on
"How to applique with your embroidery machine"
Step 1:
Hoop your stabilizer and your item that you will be applying your applique to. If this is your first time trying to applique, you may want to just use a couple of layers of stabilizer and nothing else.
Step 2:
(Depending on how your design is digitized, this step may vary a little. Some designs will have a placement stitch and some will not. A placement stitch shows you where to place your fabric. Almost all of our applique's will have a placement stitch.)
If your design has a placement stitch then step 2 would be to put your hoop into your machine and have the design stitch out the placement stitch. If your design does not have a placement stitch then you would skip step 2 and go straight to step 3
Step 3:
Place your fabric on your hoop completely covering the area to be stitched. You can use a few straight pins on the edges of your fabric if you want to, to hold your fabric still while the stay stitches secure the fabric to your item. (pinning the fabric is usually not necessary however, if you are worried or have issues with your fabric moving around you can do this. You can also use a basting spray instead of pins if you would like)
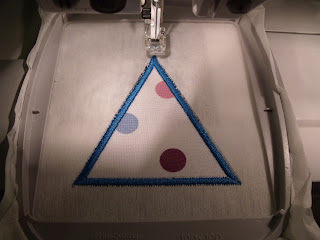
Place your hoop back into your machine (if you took it out) and stitch out the stay stitches that will secure your fabric to your item. When the machine stops, remove the hoop from the machine but, DO NOT REMOVE YOUR ITEM FROM YOUR HOOP.
Remove any pins if you used them or peel up your edges if you used basting spray. Take a pair of sharp embroidery scissors and trim away all of the excess fabric from around the outside edges of your design.
Step 5:
Place your hoop back into your machine and stitch out the satin stitch border of your design.
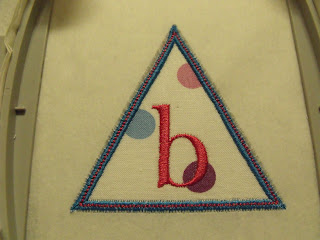
A lot of applique designs will have multiple layers. Each layer will be the same process (steps 2-6) Some may have detailed fill stitching or decorative stitches over the satin stitch area. Others you may want to monogram initials or a name layered on top. This would all be done as a final step once the entire applique is complete.
Once you start your first applique, you will be hooked. It is so much fun and so simple. Do not be intimidated!! Anyone can do this, it really is that easy.
Just click this link to download this free practice applique from our website:
♥
Jacki & DeLynne
Embroitique
♥
www.embroitique.com | esales@embroitique.com
***Click here to Follow us on Facebook***
www.embroitique.blogspot.com | www.embroitique.etsy.com


This comment has been removed by the author.
ReplyDeleteThis comment has been removed by the author.
ReplyDeleteThis comment has been removed by the author.
ReplyDeleteThis is really amazing and useful guide on how to applique with your embroidery digitizing machine. A great step by step tutorial; very easy to understand. Thanks.
ReplyDelete